


How to Easily Mod Podge on Wood
JUNE 25, 2018

This week we designed some cute, rustic farmhouse prints for your next DIY project! Knowing farmhouse décor is all the rage, we thought you might like some free printables that you can easily mod podge on wood. It’s pretty easy and you don’t need much in the way of supplies. Most of the products came from Michaels, as they have fabulous coupons going as high as 70% off regular priced items. You can keep this for yourself or gift it. It’s great for all occasions and who doesn’t appreciate a hand crafted present? Happy crafting!
Here is What you Need:
Smooth wooden plaque
220 grit sandpaper
Mod podge
Ruler
Foam brush
Laser printer
8.5 x 14 legal paper
Prep Your Board
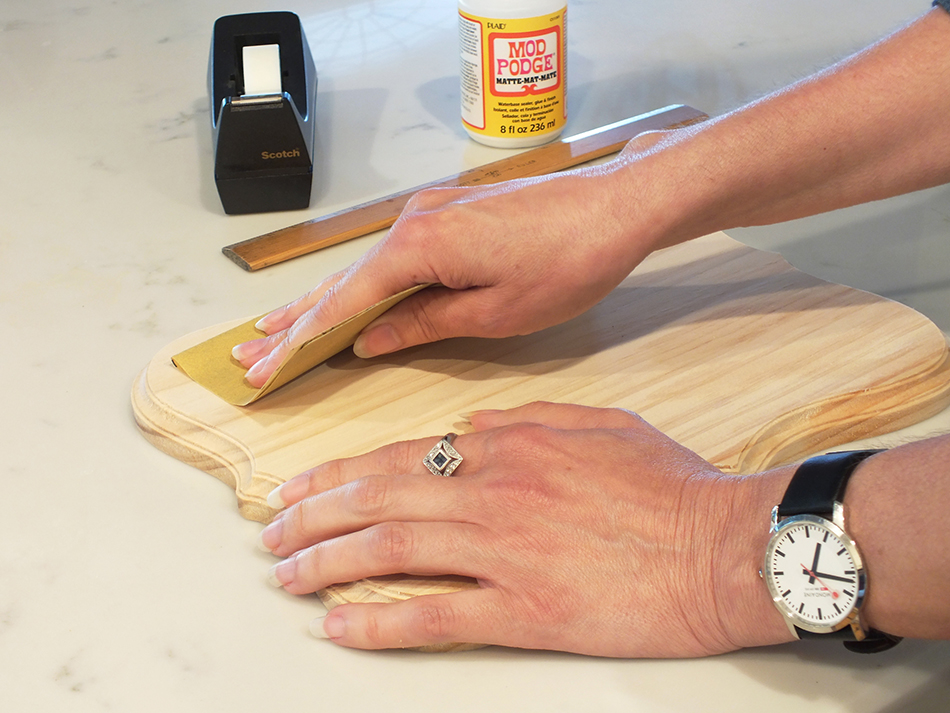
Make sure you purchase a smooth plaque. The one we are using here is already pretty smooth but we decided to give it a quick sanding with 220 grit paper before starting the project. The smoother your wood is, the better your graphics will adhere. Wipe the board clean from the dust of sanding.
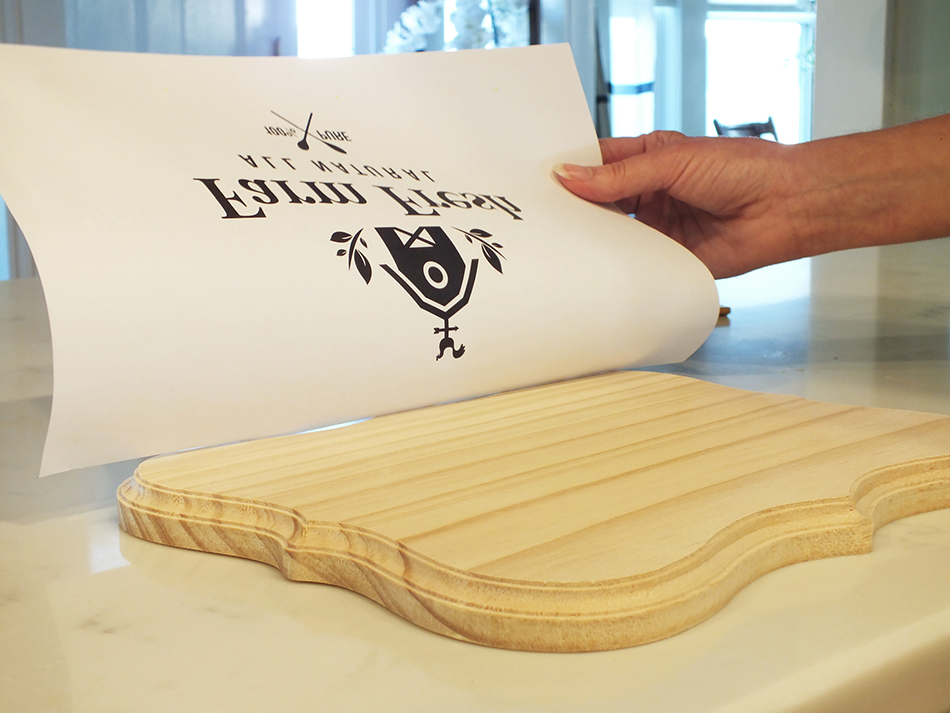
Print Artwork
Print the downloadable file which we reversed so the image will appear correctly on the plaque. In order for the text to show properly, when doing a transfer, you have to reverse print or mirror the image. No worries here though as we already reversed the image. All you need to do is print it on 8.5 x 14 paper using a laser printer. If you don’t have a laser printer, a local print shop will be able to print you a copy and it’s really inexpensive. Our local staples only cost $0.17 for a black and white 8.5 x 14 print. The reason we are using legal size is to avoid leaving lines on the board. We used 8.5 x 11 paper for our first plaque and it caused lines to appear at the edge of the paper so we decided to cover as much of the wood as possible with larger paper.
Place Artwork
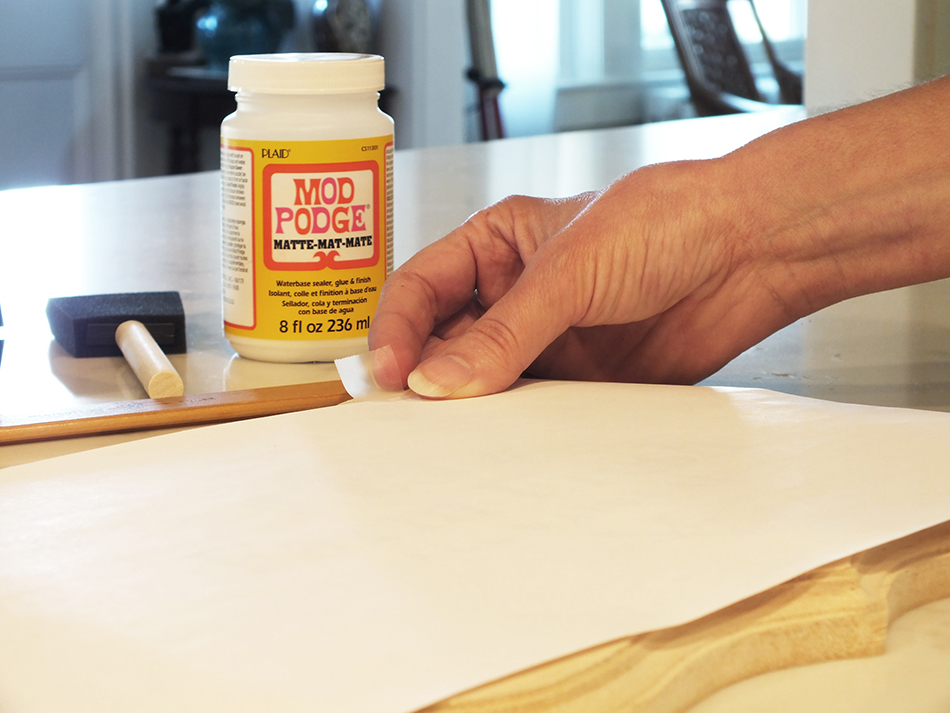
Place your image in the middle of your plaque and use a small piece of tape in the two upper corners. Placing your image while the board is dry is much easier than placing it after you have applied the mod podge. Flip the paper back exposing your plaque.
Apply Mod Podge
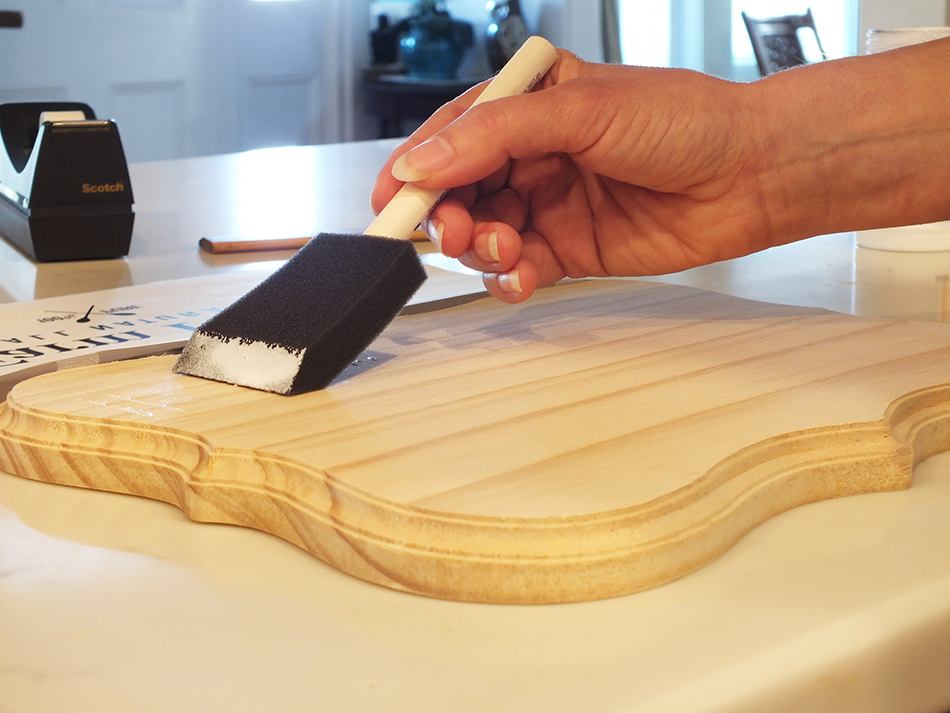
Generously apply the mod podge with your foam brush. Once applied, flip the paper back over onto the board and press the paper down from top to bottom. Take a ruler and gently glide across the paper to make sure all bubbles are pushed out.
Let Dry
Here is the hard part. Patience! Now you must allow the artwork to sit for 24 hours before removing the paper. Although we waited a full 48 hours, the 24 hours is sufficient for the artwork to adhere to the board.
Rub Away Paper
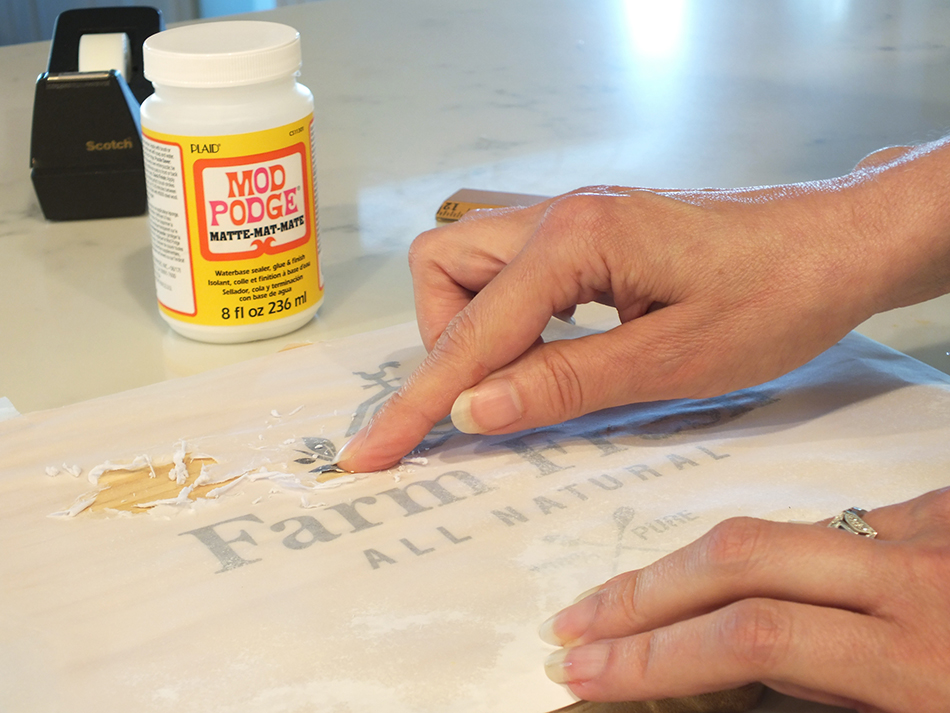
After waiting 24 hours, hold the board under running water until you begin to see the artwork come through. Next, start rubbing away the remaining paper with your finger in gentle, circular motions. If you rub too hard, it could take some of the ink off. Allow the board to dry and repeat this process several times until the paper is totally removed. It does take some patience to get the paper fully off. Be sure to not leave puddles of water on the board for too long as it can cause it to warp, which happened to one of ours. After a couple of days of drying, the board did straighten out. If some of the transfer comes off, you can leave as is for a more rustic look or you can touch it up with dabs of permanent marker.
Apply Final Coat
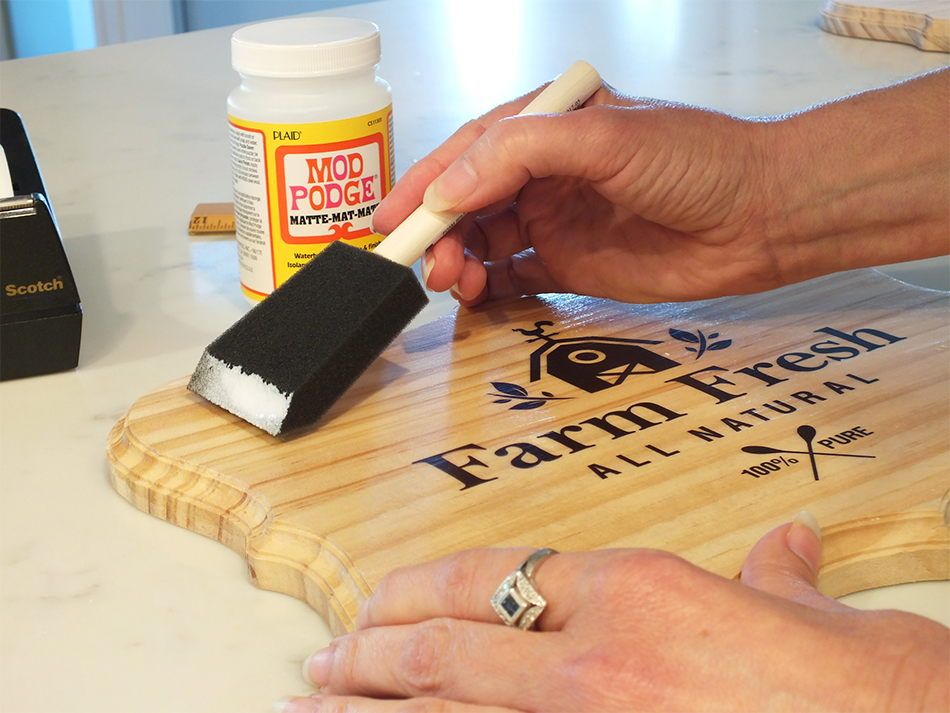
Once the paper is completely removed and your plaque is dry, apply another layer of mod podge. This will give the plaque a finish to ensure longevity.
Leave a Reply
Want to join the discussion?Feel free to contribute!
Leave a Reply

@ct.home.designs
Leave a Reply
Want to join the discussion?Feel free to contribute!